This is a SEO version of IP Katalog PRO 2012 Ver. 2.00. Click here to view full version
« Previous Page Table of Contents Next Page »153
Installation of an electric heating element in the radiator connected to the central heating system via a multi-valve (without disassembling).
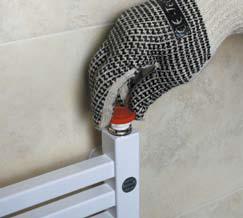
• Fill the radiator with water from the system, at the same time, bleeding it by means of the air vent placed in one of the upper connection studs. Check the threaded connections for leakproofness (photo 9). • Mount the cover (photo 10).
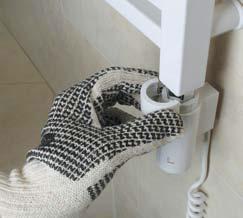
• Connect the plug of the heating element to the power socket (photo 11).
Note! Prior to starting the heating element cut the radiator off from the central heating system by shutting the thermostatic valve.

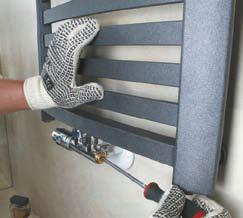
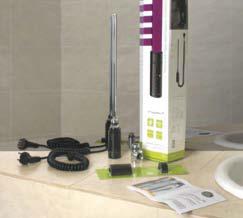
• Prepare the heating element with the fittings – unpack and check the set for completeness (photo 1). • Disconnect the radiator from the system by shutting the feed and return valves (photo 2).
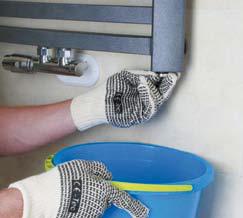
• Drain the radiator by means of one of the bottom connection studs (plugged) in which the heating element is to be installed; opening the air vent will make draining easier (photo 3, photo 4).
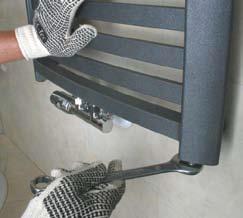
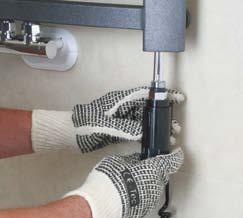
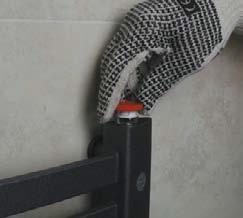
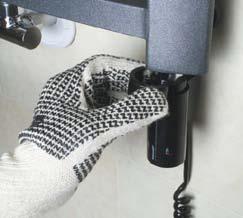
• Insert the heating element into the chosen connection stud of the radiator (photo 5). • Tighten the heating element with an appropriate spanner (photo 6).
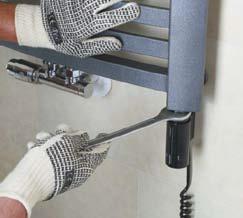
Note! Do not tighten the heating element by holding the controller casing.
• ·Fill the radiator with water from the system, at the same time, bleeding it by means of the air vent placed in one of the upper connection studs. Check the threaded connections for leakproofness (photo 7). • Mount the cover (photo 8).
• Connect the plug of the heating element to the power socket (photo 9).
Note! Prior to starting the heating element cut the radiator off from the central heating system by shutting the thermostatic valve.

This is a SEO version of IP Katalog PRO 2012 Ver. 2.00. Click here to view full version
« Previous Page Table of Contents Next Page »